floral frame

Thursday, November 7, 2013

Since childhood, I have always liked to keep the flowers in a book. They get dry in few days and are really pretty. I also remember my good friend sending those beautiful petals in a letter to me. Good memories.
   Last year, I had a bunch of red roses. When they started to wither, I took all the petals apart and kept them in a big fat book. After few days I saw really pretty small pink flowers near the University Cafeteria. I kept them in a book too but didn't take petals off as they were really small. For such collections, one might want to use a book which is fat, big and also not very important. I have observed that some flowers leave stains behind. After few days, the petals were dry and their gorgeous color was retained.
   Then, I took 3 rectangular card boards. They were thin but also strong. I had cut each of them into 4 concentric rectangles keeping the same width. I took the biggest and the third biggest frame. I didn't use the other parts, but one can use if they want. And I glued the rose petals on one frame and small pink flowers on the other. Here's how they look.


I loved the colors that these original petals had. 

Tissue paper flowers

Wednesday, November 6, 2013

I made these long ago. There are two kinds of them. The first kind can be made using instructions from
http://spoonful.com/crafts/tissue-paper-flowers
I tried different looks for these flowers. The orange flower had the edges trimmed to get a look of carnation. The yellow is not trimmed at all.


For making the second kind, I took the tissues. I laid them on a table. And I placed a circular ring on it to draw a circle. For this I used the tape roll. Then I cut the circles. From 1 tissue paper I got four circles because I didn't open the tissue paper. I used it in its normal form with four folds. By repeating this on several tissue papers, I got a lot of circles.
      Now, I took one circle and pinched it at the center holding the pinched part down. Then I took another circle pinched at the center and placed it next to the first one. They are held at the center which faces down and the edges of the circle are kind of folded and very close to each other. I repeated this process for about 15 to 20 circles holding the pinched parts all the time (It can be more depending on your choice), never letting them go. This way of arrangement slowly shapes up like petals. At the end, I used a tape and wrapped it around the pinched part that I have been holding since the beginning. I wrapped really tight and made sure that the circles were not coming off the flower. I made several flowers in the same way. Here's the finished look.


my first canvas painting

This is my first painting on canvas using acrylic colors.


Plasticky

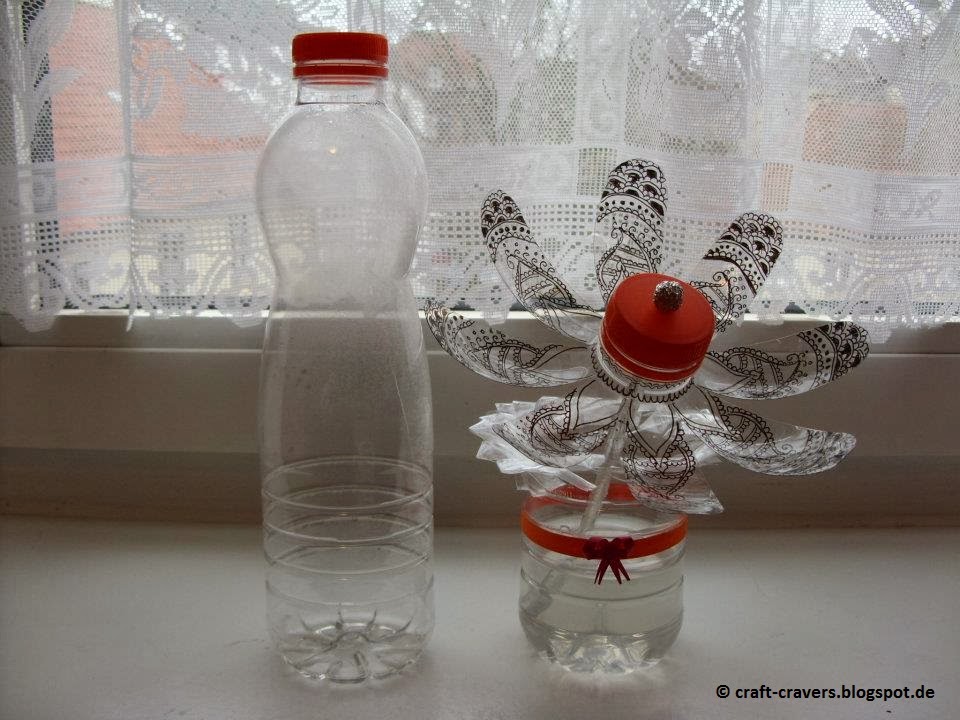
When we buy drinks, they come in plastic bottles and cartons. So one day I thought, what if we can use those to make some craft. I found a very nice way of using those bottles to make vase and flower.


I followed the website http://www.handimania.com/diy/recycled-plastic-bottle-vase.html to make the vase.
The vase only uses the bottom part of the bottle.


To make the flowers, I used the other part of the bottle. I had cut it in the shape of petals and lifted the petals in the reverse direction so that it looks like a blooming flower. After that I drew on those petals. The most time consuming job that I had in the whole project was to draw every petal. Here is a picture showing the flowers. The first one has the petals as usual. The second one has a blooming look.


To make those floweres stay in the vase, I used wooden sticks which are used for BBQ.  Then I made holes in the bottle caps using a knife. And inserted those sticks through them. To stop the sticks from falling through the hole I glued them onto small balls that I made using aluminum foil. Later, I wrapped the sticks with the foil.  This is how they look finally.


They look pretty right. Plastic isn't that bad. Don't you think ?

Snowflake

Here are some pictures of snowflakes that I made. Here is  the link explaining step by step procedure :
http://www.wikihow.com/Make-a-3D-Paper-Snowflake

Have fun.


FREE BLOGGER TEMPLATE BY DESIGNER BLOGS