Painting for kids room

Wednesday, July 18, 2018

Hello !!

Hope everyone is doing great. I wanted to share a painting I did for kid's nursery. I used acrylic paints on canvas of size 30x40 cm.

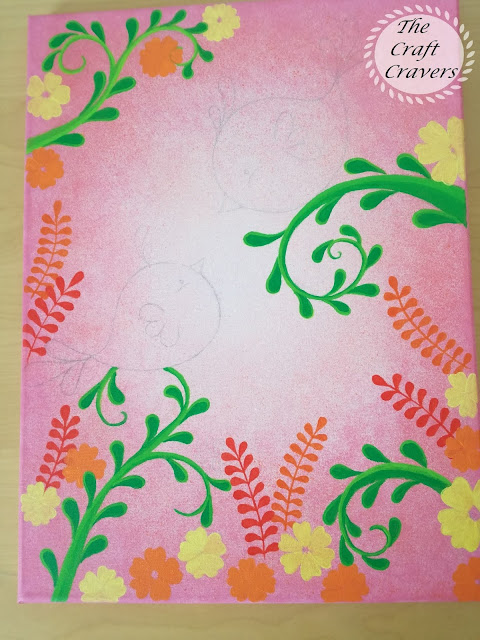
I started with background. First, I used a sponge to dab the paint.


Next, I used a toothbrush to do splatter technique. It gives tiny details and is so much fun.


Once the background was done, I started with some branches and slowly added details one after the other.


All done!!


Radhekrishna painting inspired by Kerala Mural

Friday, June 8, 2018

Hey guys 😃!!

Happy June ! Cannot believe almost half of the year has passed already. Anyway, I was so in love with Kerala Mural that I decided to do one more. This time I wanted to paint Radha and Krishna. Before we start, I have an announcement. To get regular updates on my work and to see some process videos, follow me on instagram and like the facebook page. 


I used acrylic paints on a 30 x 40 cm canvas. I did the sketch first and then started adding colour.


And done 😃 !


Krishna painting inspired by 'Kerala Mural Art'

Tuesday, May 22, 2018

Hello Folks!!

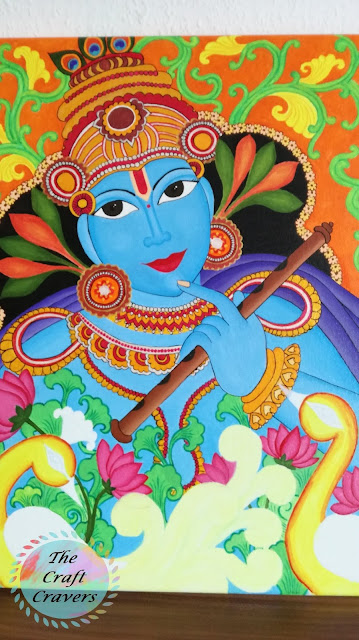
I hope all my readers are doing great 😃. I know it has been some time since you heard from me. I was under the spell of the beauty of Kerala Mural Art. I was mesmerized by the vibrant colours and the beautiful expressions of the subjects 😍. I was very excited to make something inspired by this art form. I worked for almost a month to finish this project. I was so immersed into this painting that I worked even when I was sick (am all better now 😊 😎). It was like some sweet medicine for me 😊. So without any delay, am very excited to share with you my latest  Krishna painting inspired by Kerala Mural Art.


I painted this on a 40x50 cm canvas. I used acrylic paints and some metallic acrylics for doing the jewelry. I started off with a pencil sketch. Below are some step by step photos for you to see the whole process. 


There is always a phase in painting when your work looks like ugly duckling. But you need to be patient and keep working to see the transformation into a beautiful work.


And tadaa !! 😀


I hope you enjoyed it. Until next time 🙋, Happy painting 😃.


Ganesha painting with Mixed-media

Thursday, March 1, 2018


Hi folks!

Firstly, a very happy Holi ! 😃
Today am going to share with you my new mixed-media Ganesha. 


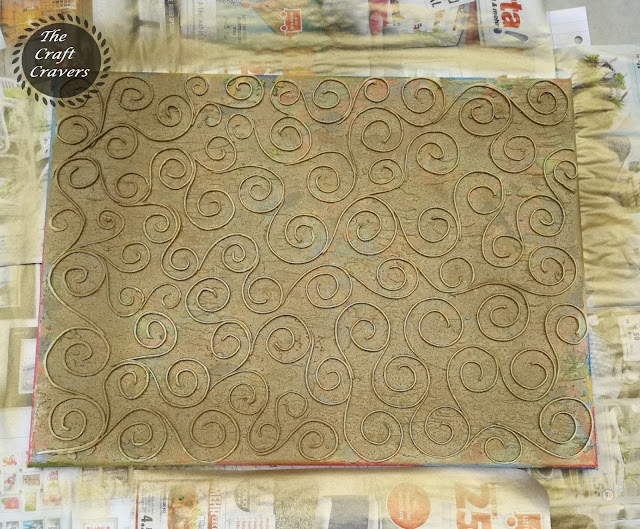
For this, I used a canvas which I painted before. The background is made by melting crayon shavings. And the swirls are made using air-dry clay. You can see the tutorial in this link → Mixed Media Art .

I used this canvas as background for my current work. I spray painted it gold.


The background now looks like this.


I decided to paint a Ganesha sitting on a pedestal with some bells in the background.  Then I made a paste of glue, talcum powder and white acrylic paint. I piped this paste into the design I desired.


I waited until this paste dried. I wanted to give it some more dimension. So for that I used spackling paste and spread it using palette knife. After the paste dried, I was not satisfied with the finish. It was very rough. So I had to use thin sheet of air dry clay and pasted it on the rough surface.

 For the pedestal, I removed the swirls. Because while working on the Ganesha, I had a really hard time filling in the gaps between the swirls. After the swirls were removed, I used coarse texture paste and applied it for pedestal.

For making the bells, I used air dry clay. I formed the clay in the shape of the bell and pasted it. For making the chains for the bells, I rolled two thin strings of clay and twisted them. After the clay was pasted and dried, I painted it with brown and metallic brown colour. 


I etched the outlines of the Ganesha using a sharp tool. And used air dry clay to make the jewelry and the crown by rolling it into thin strings.


I further used air dry clay to give details to the Ganesha. 


Once I was satisfied with the result, I started painting. I used acrylic paints to colour it. For the jewelry I used silver acrylic paint instead of gold because the background is sprayed gold.


And its all finished 😀. I know its lot of work but I really liked the dimension all these mediums (texture paste, spackling paste and air dry clay) gave.


Handmade candle using egg shell

Friday, February 23, 2018

Hello readers:) !

I would like to share a simple craft which is easy and fun. My sister made candles using empty egg shells. And I am very happy to share with you the procedure. She emptied the egg shell and washed the inside using soap water.


She melted some candle. And she has put wick inside the clean, dry egg shell. Once the candle has melted, she poured it inside the shell securing the wick.


She sprinkled some glitter over the candle while it was still liquid.
And she kept it away for drying.


Once it has properly dried, she removed the shell.


 And walla! Your  very own candle is ready :)
I thank my sister for trying it out and sharing with us the pictures 💓.


Royal Enfield painting

Tuesday, February 20, 2018

Hello readers 😃!!

I am very excited to share with you my new mixed media art. I LOVE riding bikes 💗. I learnt it when I was 15. After finishing my 10th board exams, the whole summer was spent learning to ride it with the help of my uncle. Many discouraged and ridiculed me when I started, saying a girl can't ride a bike or am too young to be able to do it. But without losing hope and with the help of my dear uncle, I was successful in 2 months. Yay me 😁 !! After my wedding I didn't get to ride the bike so much. Only when I visited my parents, I would go around with my dad. Last week I rediscovered my love for bikes and my husband loves Royal Enfield, so I decided to paint this 😃.


I used black, white and green acrylic paints to do the background.


Then I drew the sketch with a pencil.


I wanted to give a 3D look, so I used air dry clay to do the bike. I rolled the clay into thin strings and pasted them using clear dry glue.


When the clay dried, I used gold acrylic to paint over the clay. And Ta Da !! 


FREE BLOGGER TEMPLATE BY DESIGNER BLOGS