more tissue flowers
Wednesday, November 27, 2013
Tuesday, November 19, 2013
There was lot of wool left after I made the wool wreath from the previous post. I glued the wool all around the clock. The clock that I bought from Ikea looked originally like this :
I started to glue the wool from the inner circumference of the clock working towards the edges. After the redo the clock looks like this :
I started to glue the wool from the inner circumference of the clock working towards the edges. After the redo the clock looks like this :
Monday, November 18, 2013
This technique was taught to us in Art course by our teacher in school. I find this technique really creative and fun to do. For this, I took a white chart paper and filled it with different colored crayons. One may fill the paper completely with crayons one over the other or it can be filled in small random parts with one color for one part. I chose the later method. I colored using different colors in different regions of the sheet. Not coloring over the other. After doing this, I painted black acrylic paint all over the sheet making sure that no part of the sheet is left uncovered. After completely painting it black, I let it dry completely. This was the preparation for the art. Now comes the creativity of the individual. Using a slightly sharp tool, drawing on this sheet by slightly applying pressure etches the black paint away and reveals the colorful crayon beneath the paint.
I drew flowers and butterfly. But its always one's own choice. But while drawing one needs to be careful as the option of erasing it off is not that reliable. If you draw a wrong line, it is difficult to erase it. Painting black on it might help but that is always extra work. So to avoid mistakes, I draw on the black painted sheet using a blunt HB pencil. And then I use the etching tool. Here's my project :
I drew flowers and butterfly. But its always one's own choice. But while drawing one needs to be careful as the option of erasing it off is not that reliable. If you draw a wrong line, it is difficult to erase it. Painting black on it might help but that is always extra work. So to avoid mistakes, I draw on the black painted sheet using a blunt HB pencil. And then I use the etching tool. Here's my project :
Origami art
Origami was also introduced to us in our SUPW class. Project which I made looks like the photo below. Each of the sqaures are separate pieces of paper that I folded. I was going for some other form but I was satisfied with this one. After folding all these pieces, I put them together on a chart paper and glued them. And the same with the butterfly.
quilled paper art
Paper quilling is one of my favorites. Just by using paper strips, one can transform them into an amazing looking art. The are very easy to make and look very pretty when put together. Quilling reminds me of my school days. We had a course called SUPW which means Socially Useful Project Work. One of our teachers for this course had taught us the quilling technique. That was may be when I was in 7th or 8th standard. Only after so many years I remembered the fun that we had while quilling and did a project.
There are lot of videos available on YouTube for quilling tutorials. Lot of websites also demonstrate this awesome art. I made it using white paper. They look really cool when colored papers are used. I look forward to making one in future.
There are lot of videos available on YouTube for quilling tutorials. Lot of websites also demonstrate this awesome art. I made it using white paper. They look really cool when colored papers are used. I look forward to making one in future.
While doing this project I had a great time walking down the memory lane. Great times.
drawing on charts
A simple drawing that I made in 2011. I used two charts of different colors. Cut them into pieces and arranged them into a single piece. Then drew on them using sketches. I chose pink and purple colors for the charts as they go really well together. And for drawing on the pink chart I used pink sketch and purple sketch for purple chart.
Just to add a little detail I used silver pen for the purple chart and black sketch for the pink chart.
For variations, one may use charts colored for example orange and light green, orange and yellow, light green and yellow, dark blue and light blue etc.
Just to add a little detail I used silver pen for the purple chart and black sketch for the pink chart.
For variations, one may use charts colored for example orange and light green, orange and yellow, light green and yellow, dark blue and light blue etc.
Friday, November 8, 2013
Today I finished the canvas painting I started few days ago. It looks like this when finished:
I started off with painting the canvas with different colors.
Thursday, November 7, 2013
I had seen a lot of videos about crayon melting in Youtube. So I decided to give it a shot. For this you need crayons, sheet of paper and a hairdryer. I melted the crayons using the hairdryer such that the molten crayon formed some pattern on the sheet of paper. The pattern is your choice. There are lot of Youtube videos demonstrating how to do it. Here is the one that I made :
finger painting
This piece of art is really easy. Things needed are paints, cardboards and your fingers. I used acrylic paints for this but one may choose any kind. Just follow your heart and paint with your finger tips. The pattern is not specific. I chose to do waves. The good thing about this art is it has these circular imprints from the finger tips. And they look really cool.
Have fun.
Have fun.
floral frame
Since childhood, I have always liked to keep the flowers in a book. They get dry in few days and are really pretty. I also remember my good friend sending those beautiful petals in a letter to me. Good memories.
Last year, I had a bunch of red roses. When they started to wither, I took all the petals apart and kept them in a big fat book. After few days I saw really pretty small pink flowers near the University Cafeteria. I kept them in a book too but didn't take petals off as they were really small. For such collections, one might want to use a book which is fat, big and also not very important. I have observed that some flowers leave stains behind. After few days, the petals were dry and their gorgeous color was retained.
Then, I took 3 rectangular card boards. They were thin but also strong. I had cut each of them into 4 concentric rectangles keeping the same width. I took the biggest and the third biggest frame. I didn't use the other parts, but one can use if they want. And I glued the rose petals on one frame and small pink flowers on the other. Here's how they look.
I loved the colors that these original petals had.
Wednesday, November 6, 2013
I made these long ago. There are two kinds of them. The first kind can be made using instructions from
http://spoonful.com/crafts/tissue-paper-flowers
I tried different looks for these flowers. The orange flower had the edges trimmed to get a look of carnation. The yellow is not trimmed at all.
http://spoonful.com/crafts/tissue-paper-flowers
I tried different looks for these flowers. The orange flower had the edges trimmed to get a look of carnation. The yellow is not trimmed at all.
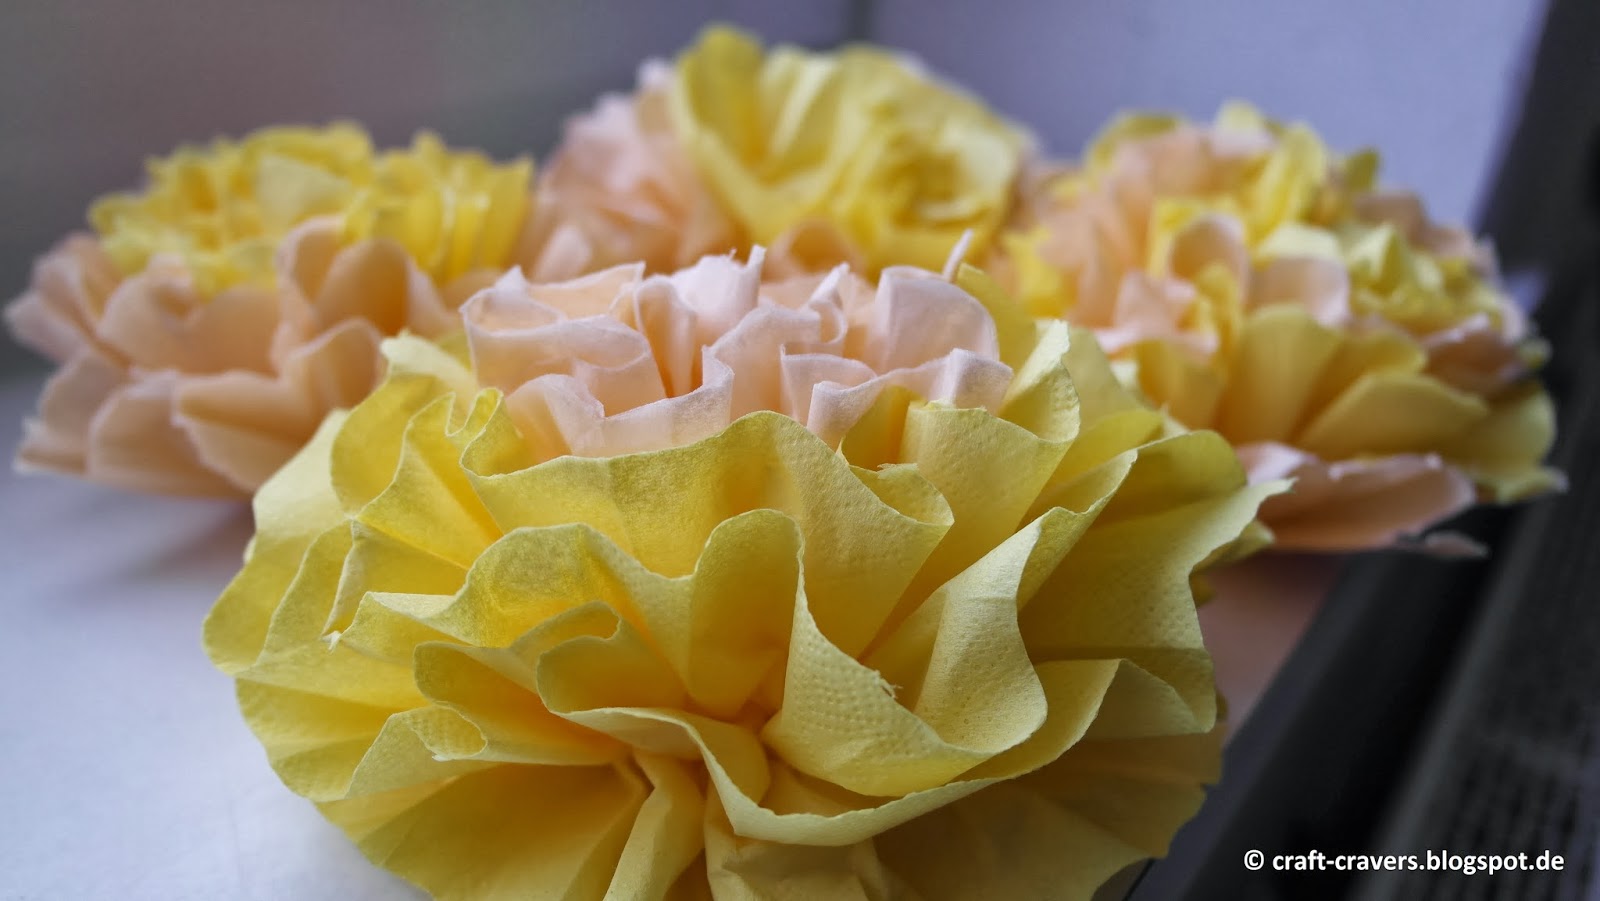
For making the second kind, I took the tissues. I laid them on a table. And I placed a circular ring on it to draw a circle. For this I used the tape roll. Then I cut the circles. From 1 tissue paper I got four circles because I didn't open the tissue paper. I used it in its normal form with four folds. By repeating this on several tissue papers, I got a lot of circles.
Now, I took one circle and pinched it at the center holding the pinched part down. Then I took another circle pinched at the center and placed it next to the first one. They are held at the center which faces down and the edges of the circle are kind of folded and very close to each other. I repeated this process for about 15 to 20 circles holding the pinched parts all the time (It can be more depending on your choice), never letting them go. This way of arrangement slowly shapes up like petals. At the end, I used a tape and wrapped it around the pinched part that I have been holding since the beginning. I wrapped really tight and made sure that the circles were not coming off the flower. I made several flowers in the same way. Here's the finished look.
Plasticky
When we buy drinks, they come in plastic bottles and cartons. So one day I thought, what if we can use those to make some craft. I found a very nice way of using those bottles to make vase and flower.
I followed the website http://www.handimania.com/diy/recycled-plastic-bottle-vase.html to make the vase.
The vase only uses the bottom part of the bottle.
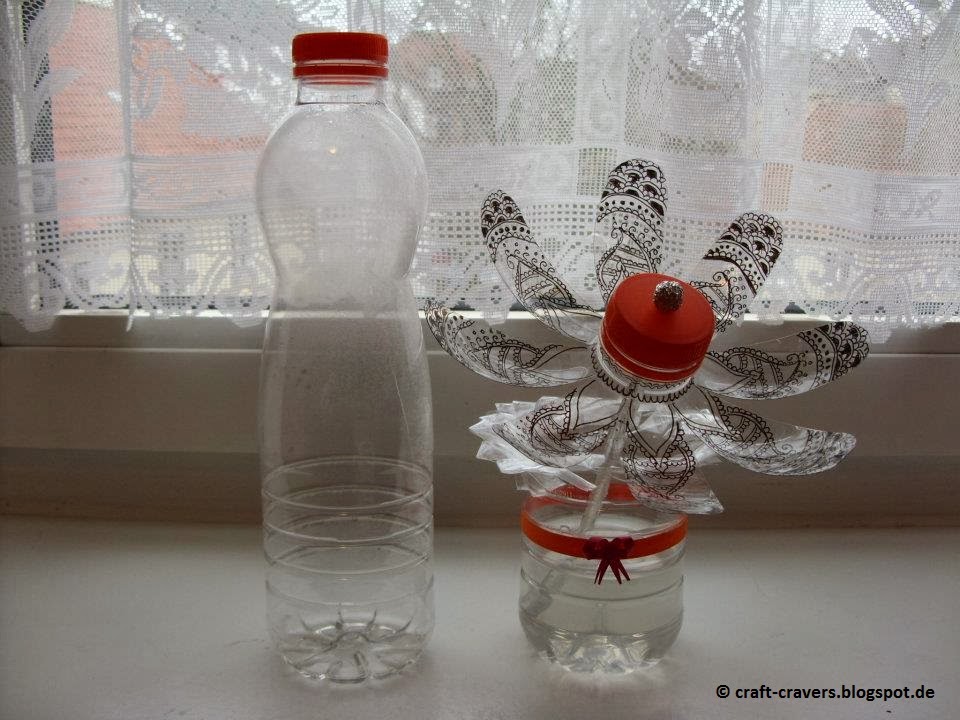
To make the flowers, I used the other part of the bottle. I had cut it in the shape of petals and lifted the petals in the reverse direction so that it looks like a blooming flower. After that I drew on those petals. The most time consuming job that I had in the whole project was to draw every petal. Here is a picture showing the flowers. The first one has the petals as usual. The second one has a blooming look.
To make those floweres stay in the vase, I used wooden sticks which are used for BBQ. Then I made holes in the bottle caps using a knife. And inserted those sticks through them. To stop the sticks from falling through the hole I glued them onto small balls that I made using aluminum foil. Later, I wrapped the sticks with the foil. This is how they look finally.
They look pretty right. Plastic isn't that bad. Don't you think ?
Snowflake
Here are some pictures of snowflakes that I made. Here is the link explaining step by step procedure :
http://www.wikihow.com/Make-a-3D-Paper-Snowflake
Have fun.
http://www.wikihow.com/Make-a-3D-Paper-Snowflake
Have fun.
Subscribe to:
Comments (Atom)


